
Every month we send all our hosting customers exclusive stock images to use how they like. Just like most large photos, they’re several thousand pixels high and wide, and they haven’t been compressed in any way so they can even be printed if needed.
But when you’re using photos or images of any kind on your website, you want to optimize them for the web so that they don’t slow down your website as much and your visitors have a better experience. This is especially true for mobile visitors who could be hanging around a long time waiting for your images to display – or at worst, being charged for the privilege by their data provider.
The difference between optimized and unoptimized images are huge. Take a look at how fast this optimized image (163 KB) loads compared to this largely unoptimized image (5 MB). Times that by the number of images on your page, then by your site, and it makes a big difference to browsing speed, especially over mobile and slower connections.
There are plenty of different ways to compress your images, so let’s take a look at some of the most popular.
Currently reading: How To Optimize Your Images For The Web Click To Tweet
Dimensions and file type
Before we go into ways to compress images, take a look to see if there are any quick wins you can make first.
1. What dimensions are your image? If you’re creating a horizontal banner or an image to go in your blog post and the photo you’re planning to use is 5000 x 5000 px, you can resize it to make it 1500 px by 600 px or even smaller. Even full-width images work fine at 1500 px. For in-post images, you can often get away with 900 px wide.
To resize your image, go into your preferred graphics program and look for image size adjustment tools (in Photoshop, for example, it’s Image > Image Size). You can also use the cropping tool to make your image smaller by cropping width or height from it and then changing the image size.
2. What file type are you choosing? When you’re saving an image for the web, if it has any transparency, you’ll want to save it as something.png. If not, opt for jpeg/jpg because they’re typically smaller file sizes.
Now that’s out of the way, it’s time to get compressing.
Optimizing images within your preferred graphics program
This will come down to what software you’re using, but many programs and online tools will have some kind of “Save for Web” or “Image Compression” option. In Photoshop, it’s in the ‘File’ menu, where you can ‘Save for Web & Devices’ or ‘Export’ and ‘Save for Web & Devices’, depending on your version (there may also be the word ‘Legacy’ in there somewhere, which is fine).
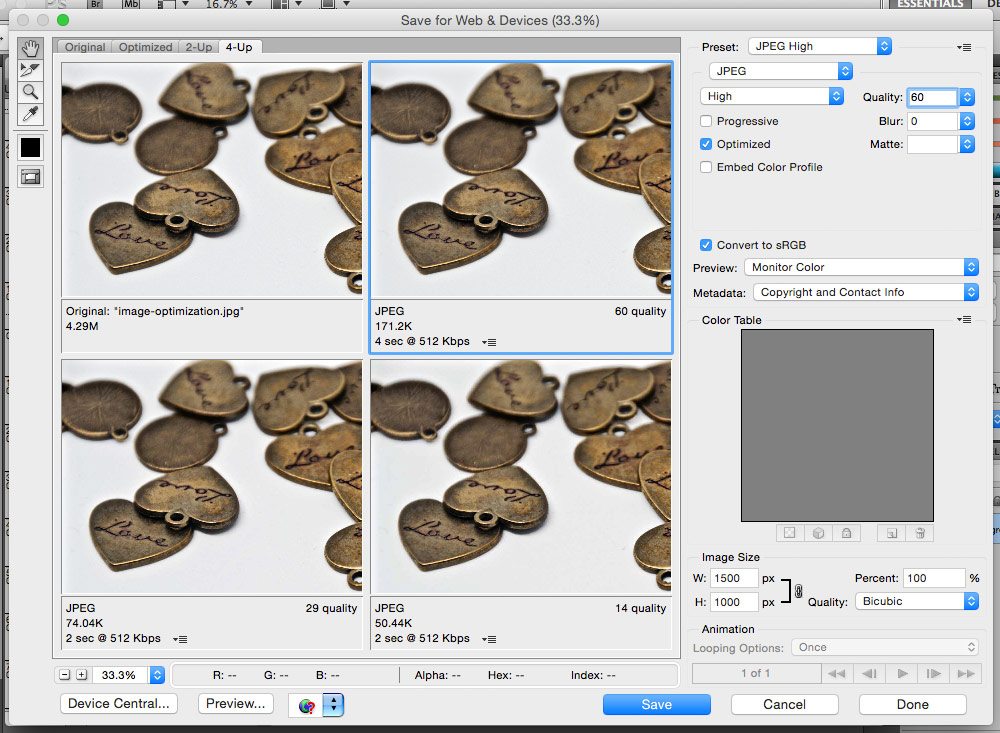
Saving this way is ‘lossy’, which means you’ll lose some of the image quality the more you reduce the number next to ‘Quality’. This is a balancing act: the more you reduce the number the smaller your image size will be, but the more pixelly and blocky it will be. For a standard photo, I typically go for somewhere between 60-70, which is still considered high quality! You’ll also want it at 72dpi (it’s generally the default setting so don’t worry if you can’t find it) unless you’re planning to print the image at any point.
Optimizing images using online tools
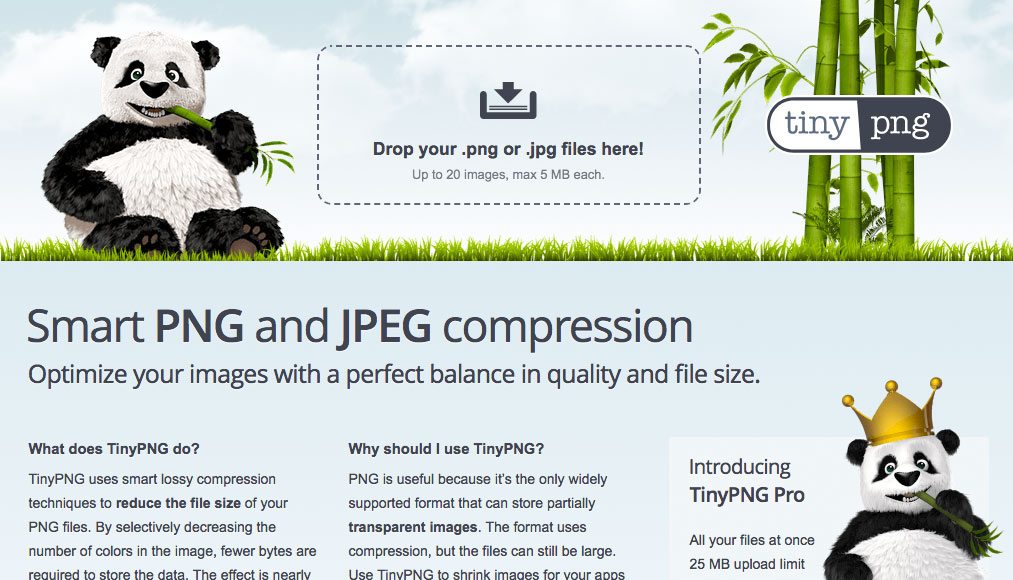
If you don’t have an image compression tool in your graphics software, don’t worry! There are plenty of online tools to do the job, the most popular of which is TinyPNG (it also compresses jpgs).
To use it, upload your images and it will compress them to smaller sizes. Please note that you should resize your image dimensions so your image is under 2500 x 2500px before using this tool. You can do this using a cropping app on your phone or using an image editor such as Canva, PicMonkey, or a paid Adobe program.
Optimizing images using WordPress plugins
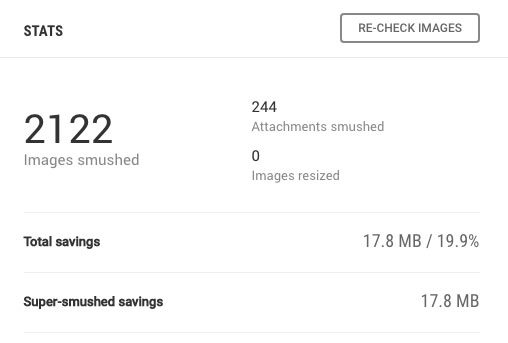
If you’re a WordPress user, it won’t surprise you that there are plenty of great options for compressing images within WordPress. One of our favorites is Smush Image Compression and Optimization, which you can search for and install from your WordPress Dashboard (we’ve listed more of our favorites here: 7 essential free WordPress plugins).
Smush is a free lossless compression plugin, which means it reduces image size without compromising on quality. The downside of this is that it doesn’t take as much off the image size. It can also be set to remove EXIF data from your image (photography information like shutter speed), which reduces the file size too.
If you’ve had a website for ages but never compressed images up to now, just run Smush to reduce your images for now and then use one of the tools above for your new images from this point in addition to Smush.
Lossless vs lossy
We recommend using a lossy image compression tool followed by a lossless compression tool to shave a bit more off the loading time. For example, you could ‘Save for web’ in Photoshop with around 65% quality, then upload the image to your WordPress website and run Smush or another WordPress image compression plugin.
What size should my images be?
The short answer is: it depends. You’re always looking to find the right balance between quality and size, but ideally you want all your images to be under 200 KB. Smaller images, such as icons, can be under 10 KB without much effort. Every little helps, so don’t skip an image just because you think it’s small already!
Extra tips for image speed:
- Try to only use images where they serve a purpose, instead of just using them to fill gaps.
- Use thumbnails, especially for galleries or grids, so users can decide whether they’re interested or not.
- Use jpegs/jpgs as the file type where possible
- Check your pages on various mobile devices to see how fast the images load.
- Use image display options or even plugins to display images in the size you want (e.g. Medium instead of Full Size when you add an image to a post or page).
- Test your image download speeds from a new device or browser because otherwise you’ll see your cached versions which will naturally be much quicker.
- Avoid unnecessary images on key pages, such as your checkout or user registration.
What are your top tips for optimizing image speed? Let us know in the comments!

Want to learn more about SEO?
If you liked this post, you’ll love Navigating SEO! Navigating SEO is a comprehensive text-based course with over 100 lessons, 15 downloads, and plenty of tasks to help you stay on track. It’s designed for bloggers and digital business owners, is very budget-friendly, and you get lifetime, evergreen access. Plus, you can start any time!
Learn more about Navigating SEO
Pin for later:


Amira
Omg, this was exactly what I was looking for! Already pinned and followed you too! Thanks so much for sharing this detailed post on optimizing images because this is something that is often neglected and affects your website speed as a result.
Pingback: Why You Should Ignore Google PageSpeed Insights - Lyrical Host
Pingback: What Bloggers Need To Know About Google Core Web Vitals - Lyrical Host
Pingback: The Most Common Site Speed Mistakes Bloggers Make - Lyrical Host
Pingback: How To Reduce Your Digital Carbon Footprint - Lyrical Host
Pingback: Building a Better Blog The Second Time Around - Penned By Paula
Pingback: 21 Body Positive Stock Photo Websites (Free & Paid) - Lyrical Host
Pingback: Flatlay Photography Prop Ideas (Free & Paid) - Lyrical Host