

If you follow us on Twitter, you may have noticed that all the links we share are shortened using our own custom domain name, https://lyri.cl.
The good news is that it’s super easy to set up a custom URL shortener for yourself, and it’s very cheap to do – all you need is a domain name you’re not using for anything else.
Let’s do this!
Currently reading: How To Set Up A Custom URL Shortener (In Just 15 Minutes!) Click To Tweet
01. Choose a good domain name for your URL shortener
For consistency and branding reasons, you’ll want to pick a domain name that is reminiscent of your main domain. To make it shorter, you could remove vowels, use only part of your domain name, or if your domain contains multiple words you could reduce to an acronym or initialism. So for example, with Lyrical Host, we could have picked lyrcl.co or lhost.io as a URL shortener.
Unsurprisingly, we recommend you choose a short domain name extension – a .photography domain isn’t going to cut it here! The two letter extensions we sell are perfect for shorteners, and there’s a good selection to choose from: .uk, .co, .no, .io, .es, .ch, .me , .se, .us, .ca (Canadians only), .de (Germans only), .fr, .in, .im, .be, .nl, .it, .eu (EU only).
Note: Your domain name needs to be under 15 characters total for it to be eligible for use as a link shortener.
Have a search here and see if the domain you want is available. Once you’ve found one you’re happy with, head through checkout to register it.
02. Create a Bitly account
Once you’ve registered your domain, it’s time to set up your shortener. For this tutorial, we’ll be using Bitly, so head to https://bitly.com and create a free account.
Next, you’ll need to verify your email address for your Bitly account as per their instructions.
03. Change the DNS settings
This basically means you’re telling your domain name to point to Bitly’s service. To do this, log into your control panel at https://cp.lyricalhost.com.
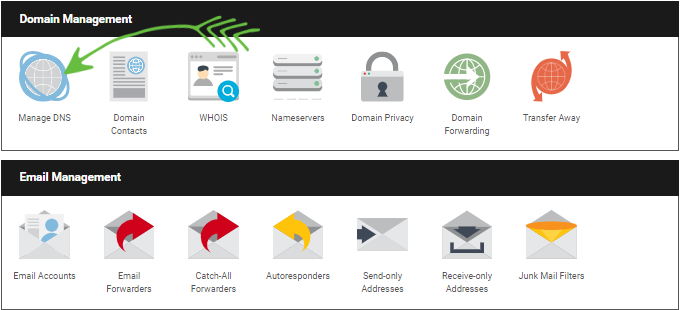
a) Click “Manage” next to the domain you’re planning to use.
b) Click the “Manage DNS” icon:
c) Edit the existing A Records for your domain name and change the IP addresses to 67.199.248.12 and 67.199.248.13 (as shown in the following screenshots).

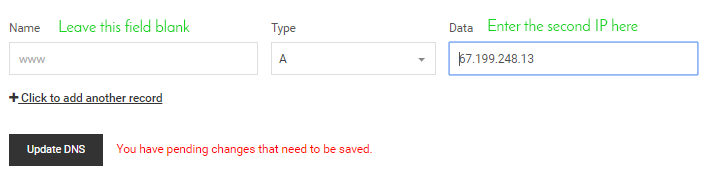
d) Finally, click “Update DNS” to save your changes.
04. Complete Bitly setup
Head back to bitly.com and click your username at the top right of the screen. From there you can choose to ‘Manage’ a group.
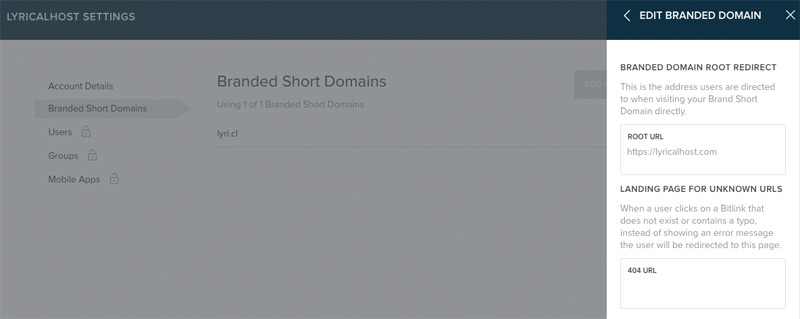
On the left hand side of the screen, choose ‘Branded Short Domain’. From here you can click your domain to configure some options:
HTTPS and SSL Configuration – HTTPS should automatically be enabled for you, so your short URL starts https:// instead of http://
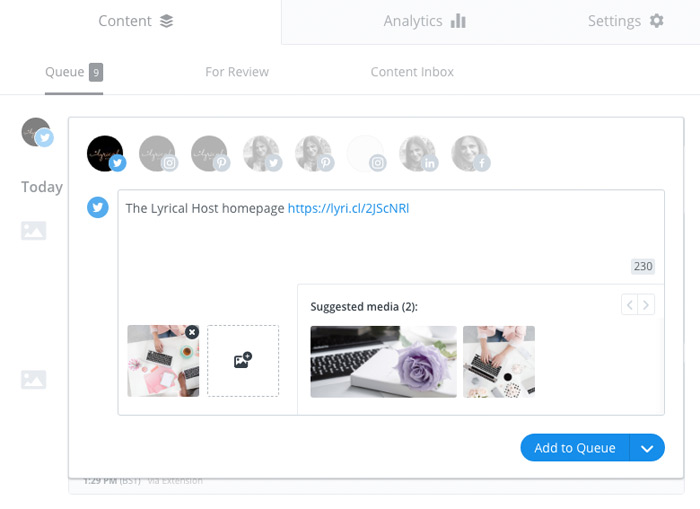
Root & 404 Redirects – Here you can set the URL people go to if they visit your short domain directly (ours is just set to the Lyrical Host homepage), and a 404 URL (if someone visits your short URL and enters an invalid or uncreated keyword, you can choose where to send them instead).
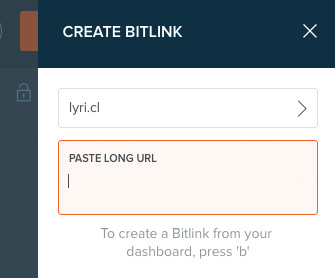
Now click ‘Create’ at the top right of the page, enter any URL in the box and Bitly will automatically shorten it for you!
If you use a social media scheduler like Buffer or Hootsuite, you can make sure it automatically pulls your custom URL shortener in the settings by selecting the Bitly option in your scheduling tool and giving permission for it to be connected to your Bitly account. Once set up, whenever you paste a URL into your social media scheduling tool, it will automatically be shortened with your new custom URL.
Enjoy your new shorter URLs!
Pin for later:


No Comments